Assembly Instructions

View the latest Assembly Instructions.

In this manual, we will turn an empty board with nothing exciting about it,...

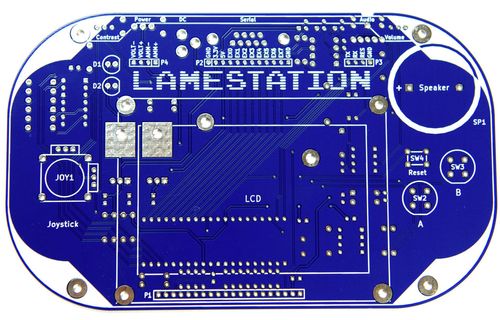
...into a fully functional game console that you build yourself!

What makes a LameStation?

The LameStation can be divided into six systems or parts. These parts are power, brain, serial, audio, control, and display.

What's inside?


This prepares and distributes power from the battery or adapter to be consumed by the devices on the board.

This is the brain of the LS; the Propeller is the computer on which the LameStation is built.

This is a communication system by which new software can be loaded onto the device.

The buttons and joystick that provide all user input.

The system that converts the digital output from the microcontroller to a smooth audio waveform, then amplifies it and drives a speaker or headphones.

The entire graphics subsystem up to and including the LCD.

How is it organized?

Whenever possible, the board itself is organized by subsystem, with related components grouped together.

How is this manual organized?


This manual works through the six systems of the LameStation, installing different parts as needed in a slow, methodical way that allows you to test your assembly as you build it.

The manual is divided into eight sections. Each Section page talks about how the hardware works conceptually, then contains Step pages that walk through the actual assembly process. Step pages usually require about 45 minutes to complete.

Section 1: Getting Started

Here, we introduce the basics of soldering by adding our very first component to the LameStation, the power jack.

Section 2: Power

In this section, we introduce the basics of electricity by building a power supply for the LameStation, which provides electricity to the rest of the system.

Section 3: Brain

Here, we discover what makes a LameStation tick, by bringing it's microcontroller brain to life.

Section 4: Serial

In this section, we will build a programming interface for the LameStation, so you can actually load new stuff onto it.

Section 5: Control

In this section, we assemble the joystick and button controls, which allow the player to interact with the console.

Section 6: Audio

In this section, you will build a totally awesome amplifier that you can use to pump some sweet LameStation tunes.

Section 7: Display

In this section, you will see the light―or a little over 8000 lights, literally―because you will add the display!

Section 8: Finishing

In this section, you will finish off your LameStation by adding the battery holder, cover plate, and any other components still left.

Hardware Reference
Appendix A: Troubleshooting

Tablet users! We recommend following these instructions on a desktop computer!

Some of the instructions don't render the same way on a tablet or mobile device.

Credits


Authors: Brett Weir; Hernan Acevedo, Marko Lukat
Photography: Peter Huynh, Brett Weir

Assembly Trial Participants: Spencer Dewar, Adib Towfiq, DK Nguyen, Devonte Cunningham, Ben Pae, Hernan Acevedo, Jessica Koehler, Heather Coles