Overview
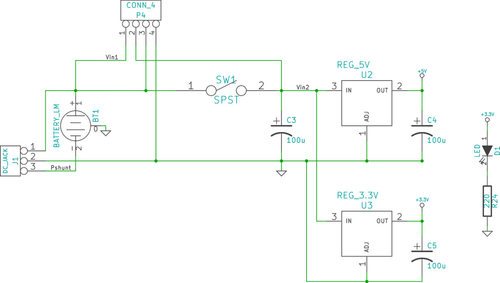
The LameStation is powered in one of two ways; using the on-board 4AAA battery pack or an external DC power supply. You do not need to worry about conflicts between the two. The LS automatically switches between the two sources using a shunt switch in the power jack.
The battery pack is a large, plastic obstruction to everything else you need to assemble, so this is one of the last items to go on the board, much later.
You will be introduced to a few things here: resistors, capacitors, and diodes.
What Is A Resistor?
What Is A Capacitor?
What Is A Diode?
Schematic
Parts Needed
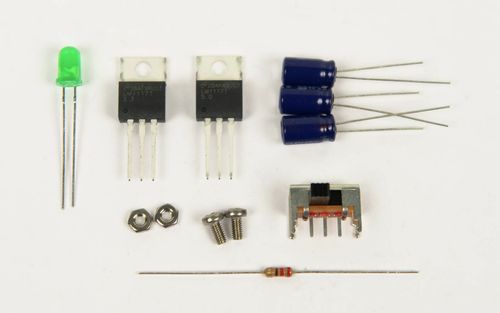
(Top row from left to right)
- 1 x Green LED
- 1 x 3.3V regulator
- 1 x 5V regulator
- 3 x 100μF capacitors
(Middle row from left to right)
- 2 x Metric nut
- 2 x Metric screw
- 1 x Slide switch
(Bottom row from left to right)
- 1 x 220Ω resistor
- 1 x 4-pin socket
Sections
| Child pages (Children Display) |
|---|
| Excerpt | ||
|---|---|---|
| ||
In this section, we introduce the basics of electricity by building a power supply for the LameStation, which provides electricity to the rest of the system. |