Tools Needed
Soldering Iron
Solder
Solder Stand
Sponge
Soldering Basics
Solder Joints
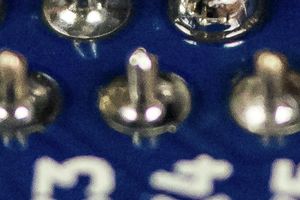
Not Enough Solder
Too Much Solder
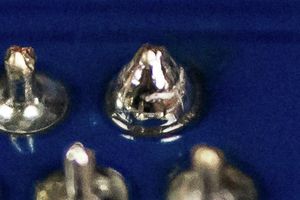
If your solder joint looks like a ball, you've added too much solder. This will get harder to heat up and more likely to spill over to its neighbors.
Cold Solder
Burned Joint
Lifted Pad
Solder Bridge
| Status | ||||
|---|---|---|---|---|
|
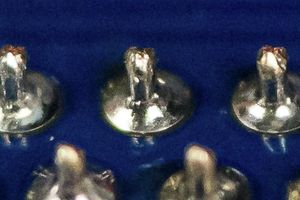
Juuuuuust Right
The perfect solder joint should be shaped like a Hershey's Kiss, but not anywhere near as delicious.
| Info |
|---|
How hot is too hot? The LameStation comes with lead-free solder, which has a higher melting point than leaded solder, so it will take more power to get it to melt. |
Instructions
| Warning |
|---|
Don't plug in the iron until you are ready! Always unplug the iron when you are not using it. |
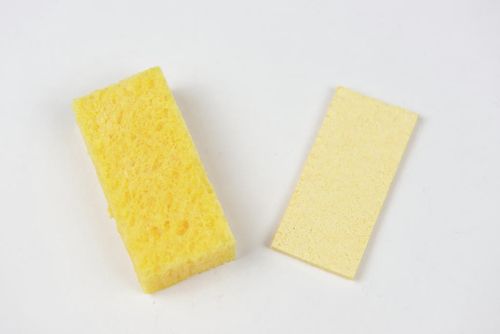
Dampen the sponge with some regular tap water.
INSERT PICTURE OF WETTING THE SPONGETurn on the soldering iron. If your iron has a temperature control, you will want to set it to about 450°C for lead-free solder. Or if it doesn't, just plug it in and wait for it to heat up. This may take a couple minutes.
Press the tip of the soldering iron to the wet sponge briefly. If you hear a sizzle, you know that the iron is hot.
Warning DO NOT touch the tip with your finger to see if it is hot! You will get burned!
- Melt some solder onto the tip of the iron. This is called tinning the tip. This cleans the tip and helps it to melt solder better.
- Wipe the iron against the sponge to remove any excess. You only need to do it once or twice (but do it as many times as is fun!)
- You are now ready to start soldering!